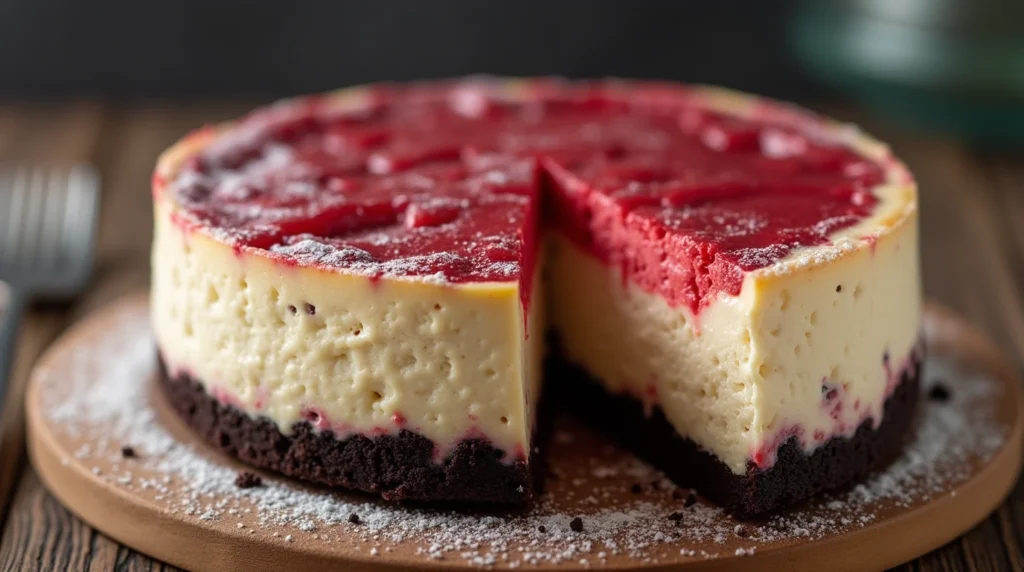
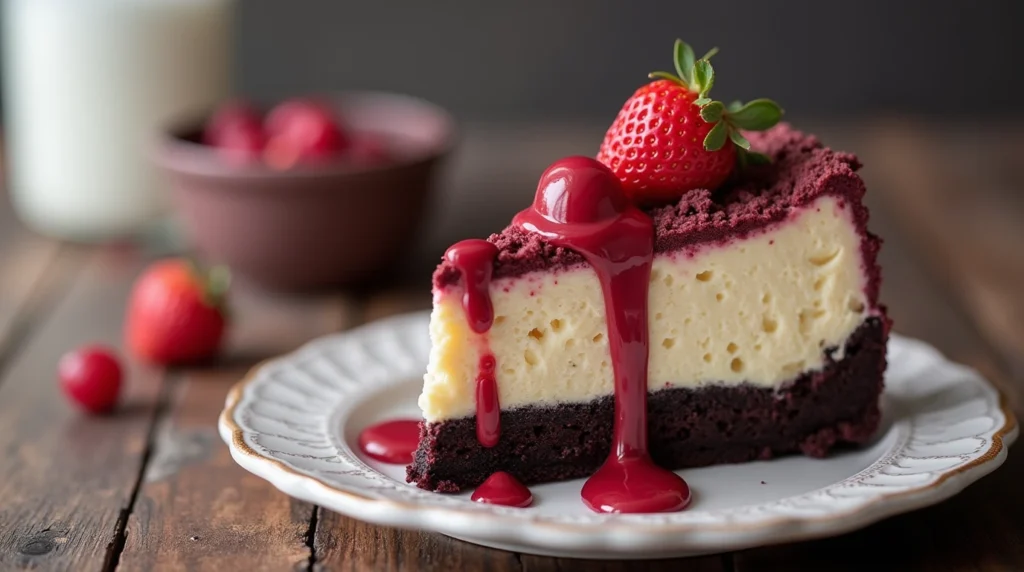
When it comes to showstopping desserts, few can rival the charm of a Red Velvet Oreo Cheesecake. Imagine the velvety richness of red velvet cake paired with the creamy decadence of cheesecake, all nestled on a crunchy Oreo crust. Whether you’re looking to impress at a family gathering or add a touch of romance to a special occasion, this dessert is sure to steal the spotlight.
Have you ever wondered how to combine classic flavors into one irresistible treat? This recipe does just that, creating a harmonious blend of textures and tastes that’s as visually stunning as it is delicious. So, grab your apron and get ready to whip up a dessert you’ll fall in love with—bite after bite!
Table of Contents

Key Benefits of Red Velvet Oreo Cheesecake
Why choose the ordinary when the extraordinary awaits? This Red Velvet Oreo Cheesecake brings together the best of two classic desserts, creating a treat that’s both indulgent and unforgettable. Here’s why this dessert deserves a spot on your table:
Perfect for Any Occasion: Whether it’s a romantic dinner, a birthday celebration, or a casual weekend dessert, this cheesecake adds a touch of elegance to any event.
Irresistible Flavor Fusion: The rich, chocolatey notes of red velvet cake perfectly complement the creamy tang of the cheesecake filling, while the Oreo crust adds a satisfying crunch.
Visually Stunning: Its vibrant red hue and velvety texture make it a showstopping centerpiece that’s just as delightful to look at as it is to eat.
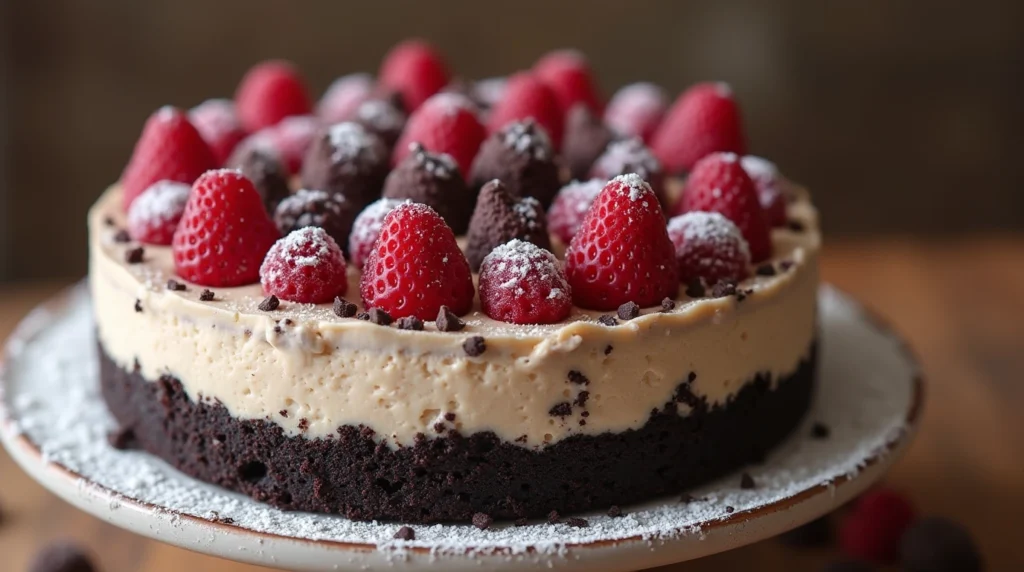
Customizable: Add your favorite toppings like whipped cream, chocolate shavings, or fresh berries for a personalized touch.
Beginner-Friendly: With clear instructions and simple ingredients, this recipe is perfect for both seasoned bakers and kitchen novices.
Get ready to impress your loved ones and treat yourself to a dessert that checks all the boxes for flavor, texture, and presentation!
Ingredients You’ll Need
Let’s gather everything you need to make this Red Velvet Oreo Cheesecake a success. With simple, easily available ingredients, you’ll be amazed at how this dessert comes together like magic. Here’s what you’ll need:
For the Oreo Crust:
- 24 Oreo cookies (regular or double-stuffed, your choice!)
- 5 tablespoons unsalted butter, melted
For the Red Velvet Cheesecake Layer:
- 16 ounces cream cheese, softened to room temperature
- 1 cup granulated sugar
- 2 large eggs
- 1 teaspoon vanilla extract
- 2 tablespoons unsweetened cocoa powder
- 1/2 cup sour cream
- 1 tablespoon red food coloring (adjust for your desired hue)
For the Cheesecake Filling:
- 16 ounces cream cheese, softened
- 1/2 cup granulated sugar
- 2 large eggs
- 1 teaspoon vanilla extract
- 1/4 cup heavy cream
Optional Toppings:
- Whipped cream
- Chocolate shavings
- Crushed Oreos
- Fresh berries
By gathering these ingredients, you’re setting the stage for a rich and indulgent dessert that’s equal parts beautiful and delicious. Don’t forget to let the cream cheese soften before starting — this small step makes mixing a breeze!
Ready? Let’s dive into the steps that will turn these ingredients into your new favorite dessert.
Step-by-Step Instructions for Red Velvet Oreo Cheesecake
Let’s turn those ingredients into a decadent dessert that will impress everyone at the table! Follow these simple steps to create your Red Velvet Oreo Cheesecake masterpiece:
1. Prepare the Oreo Crust
- Crush the Oreos: Add the cookies, including the filling, to a food processor and blend until they turn into fine crumbs. No food processor? A zip-top bag and rolling pin work too!
- Combine with Butter: Pour the melted butter over the crumbs and mix until evenly coated.
- Press into the Pan: Line a 9-inch springform pan with parchment paper. Firmly press the Oreo mixture into the bottom to form an even layer. Chill in the freezer for 10 minutes while you prepare the filling.
2. Prepare the Red Velvet Cheesecake Layer
- Blend the Ingredients: In a large mixing bowl, beat the cream cheese and sugar until smooth. Incorporate the eggs one at a time, ensuring each is thoroughly mixed before adding the next.
- Add Flavor: Mix in the vanilla extract, cocoa powder, sour cream, and red food coloring until the batter is velvety smooth.
- Pour over Crust: Remove the crust from the freezer and pour the red velvet mixture on top, smoothing it out with a spatula.
3. Create the Cheesecake Filling
- Whip the Cream Cheese and Sugar: Beat the cream cheese and sugar together until fluffy.
- Incorporate Eggs and Cream: Add the eggs one at a time, followed by the vanilla extract and heavy cream. Mix until creamy and lump-free.
- Layer on Top: Gently pour this mixture over the red velvet layer. Gently smooth the surface using a spatula.
4. Bake the Cheesecake
- Preheat the Oven: Adjust the oven temperature to 325°F (160°C) and allow it to heat up. Place a roasting pan filled with hot water on the lower rack to create steam, which helps prevent cracks.
- Bake to Perfection: Place the cheesecake on the middle rack and bake for 60-70 minutes, or until the edges are set and the center jiggles slightly.
- Cool Gradually: Turn off the oven, crack the door slightly, and let the cheesecake cool inside for an hour. Then transfer it to the fridge to chill for at least 6 hours or overnight.

5. Add Toppings and Serve
- Get Creative: Top with whipped cream, crushed Oreos, or fresh berries to enhance the flavor and presentation.
- Slice and Enjoy: Use a sharp knife, wiping it clean between cuts, to achieve perfect slices.
Now, take a moment to admire your work before diving into this show-stopping dessert. Enjoy!
Pro Tips and Variations for Red Velvet Oreo Cheesecake
Elevate your Red Velvet Oreo Cheesecake game with these expert tips and exciting variations:
Pro Tips for Success
- Room Temperature Ingredients: Always use room-temperature cream cheese, eggs, and sour cream for a smoother, lump-free filling.
- Avoid Overmixing: Overmixing can introduce air bubbles, which may cause cracks during baking. Gently mix the ingredients until they are just combined, avoiding overmixing.
- Use a Water Bath: Even if you’re not baking in one, placing a pan of water on the lower rack creates steam that helps maintain a moist texture and prevents cracking.
- Check for Doneness: The cheesecake is ready when the edges are set, and the center has a slight jiggle. It will continue to set and firm up as it cools.
- Cool Gradually: Sudden temperature changes can cause cracking. Let the cheesecake cool in the oven with the door ajar before refrigerating.
Variations to Try
- Chocolate Lover’s Twist: Add mini chocolate chips to the red velvet batter for bursts of chocolatey goodness.
- Festive Swirl: Create a marbled effect by reserving some plain cheesecake batter and swirling it into the red velvet layer before baking.
- Gluten-Free Option: Use gluten-free sandwich cookies for the crust to make this dessert celiac-friendly.
- Peppermint Delight: For a holiday twist, mix crushed peppermint candies into the crust or sprinkle on top.
- Nutty Crunch: Garnish with chopped pecans or walnuts for added texture and flavor.
How to Store and Freeze
- Storing: Cover tightly with plastic wrap or aluminum foil and keep in the fridge for up to 5 days.
- Freezing: Slice into portions, wrap individually in plastic wrap, and store in an airtight container for up to 3 months. Refrigerate overnight to thaw before serving.
With these tips and variations, you can customize this cheesecake to suit any occasion or preference. Whether you keep it classic or experiment with flavors, the result will always be irresistible!

Conclusion
There’s no doubt that this Red Velvet Oreo Cheesecake is a dessert that stands out in both flavor and presentation. The combination of velvety red velvet cake, rich cheesecake filling, and crunchy Oreo crust makes every bite a perfect balance of indulgence and texture. Whether you’re celebrating a special occasion or simply treating yourself, this cheesecake is guaranteed to impress.
With simple steps, customizable variations, and helpful tips to ensure a flawless result, you’ll be able to create a dessert that’s as delicious as it is stunning. So, why not give it a try? Prepare to fall in love with this show-stopping treat—one slice at a time!
FAQs
1. Is it possible to prepare this cheesecake in advance?
Yes! In fact, making this cheesecake a day in advance is a great idea. It needs time to chill in the fridge, and letting it sit overnight allows the flavors to meld together beautifully. Simply ensure it is tightly covered with plastic wrap or aluminum foil.
2. Is it possible to use an alternative type of crust?
Absolutely! While the Oreo crust adds a delicious crunch and flavor, you can experiment with other crusts, such as a graham cracker crust, chocolate cookie crust, or even a nut-based crust for a unique twist.
3. How do I know when my cheesecake is done baking?
The cheesecake is done when the edges are set, but the center still jiggles slightly when you gently tap the pan. It will firm up as it cools. If you’re unsure, use a toothpick or cake tester to check for any wet batter.
4. Can I freeze this cheesecake?
Yes! The cheesecake can be frozen for up to three months. Slice it into portions, wrap each slice in plastic wrap, and store them in an airtight container. To serve, simply thaw it in the refrigerator overnight.
5. How can I prevent cracks in my cheesecake?
To minimize the risk of cracks, avoid overmixing your batter and make sure all ingredients are at room temperature. Additionally, bake the cheesecake in a water bath or place a pan of hot water on the lower oven rack to create steam and keep the cheesecake moist.
6. Can I use a different food coloring for the red velvet layer?
Yes, you can experiment with different colors, but keep in mind that traditional red velvet gets its signature hue from red food coloring. If you prefer a natural option, you can use beet juice, though the color may be a bit different.
7. How should I store leftovers?
Store leftover cheesecake in the refrigerator for up to five days, ensuring it is tightly covered to preserve its freshness
8. Can I add extra toppings to this cheesecake?
Definitely! This cheesecake is incredibly versatile. You can add whipped cream, chocolate shavings, crushed Oreos, fresh berries, or even a drizzle of caramel or chocolate sauce for extra indulgence.
Have you tried this recipe ? how did you find it?
There are no reviews yet. Be the first one to write one.


1 thought on “Red Velvet Oreo Cheesecake You’ll Fall in Love With”